Tenzo MCP
Tenzo MCP allows you to query any data from Tenzo using natural language via your favourite AI assistant.
What you can do
The Tenzo MCP server gives AI assistants access to your restaurant data through seven tools:
Query Metrics
Sales, labour cost, covers, transactions — grouped by location, day, or category.
List Reviews
Customer reviews from Google, TripAdvisor, and other platforms, with ratings and text.
List Logs
Manager logs and shift notes, filterable by location and date range.
Helper Tools
The AI also calls these helper tools automatically at the start of each conversation:
-
get_analytics_context— Your currency, timezone, week start day, and date periods. -
get_available_metrics— Which metrics can be queried — e.g. net sales, labour cost. -
get_available_dimensions— How results can be grouped — e.g. by location, day. -
get_available_filters— How results can be filtered — e.g. by location, category.
Read-only data. It cannot modify your data, only your Tenzo configuration.
Setup
Choose your AI client below. You'll be asked to sign in to your Tenzo account the first time you connect.
- Ensure Tenzo is added as a connector — Tenzo is a custom connector. If you don't see it in your list, ask an admin to add it from claude.ai/admin-settings/connectors, pointing at
https://ai.gotenzo.com/mcp. - Open Connectors settings — Navigate to claude.ai/customize/connectors.
- Connect Tenzo — Find Tenzo in the list and click Connect.
- Authorize — You'll be redirected to sign in with your Tenzo account. Once authorized, the connector will appear as active in your settings.
- Start chatting — Open a new conversation on claude.ai and ask about your restaurant data.
- Ensure Tenzo is added as a connector — Tenzo is a custom connector. If you don't see it in your list, ask an admin to add it from claude.ai/admin-settings/connectors, pointing at
https://ai.gotenzo.com/mcp. - Open Settings — In Claude Desktop, open Settings and navigate to the Connectors section.
- Connect Tenzo — Find Tenzo in the list and click Connect.
- Authorize — A browser window will open for you to sign in with your Tenzo account. Once authorized, return to Claude Desktop.
- Start chatting — Open a new conversation and ask about your restaurant data. You should see the Tenzo tools available in the tools menu.
- Add the server — Run the following command in your terminal:claude mcp add --transport http tenzo https://ai.gotenzo.com/mcp/
- Start chatting — Start a new conversation and ask something like "What were my sales last week?". You'll be prompted to authorize via OAuth on first use.
Connect ChatGPT to Tenzo with our ChatGPT app.
- Install the Tenzo app for ChatGPT — Please install the ChatGPT plugin from here.
- Authorize — You'll be prompted to connect your Tenzo account on first use.
- Open your settings file — Edit
~/.gemini/settings.json(create it if it doesn't exist). - Add the Tenzo MCP server{ "mcpServers": { "tenzo": { "url": "https://ai.gotenzo.com/mcp" } } }
- Start a conversation — Launch the Gemini CLI and ask a question about your restaurants. You'll be prompted to authorize via OAuth on first use.
This connector runs inside Gemini Enterprise — Google's Cloud agent platform (console.cloud.google.com/gemini-enterprise), not the Gemini built into Gmail and Docs. You'll need the Standard or Plus edition and someone with Google Cloud admin access. Budget about 20 minutes end to end.
- Clear the two gates — Override the org policy that blocks custom-MCP data stores: IAM & Admin → Organization Policies, set it to Off for your project (this is org-level, so it needs an Organization Policy Administrator). Then grant the builder the Discovery Engine Editor role (
roles/discoveryengine.editor). - Create the Tenzo credentials — Gemini can't self-register, so Tenzo registers an OAuth client for you using the redirect URI
https://vertexaisearch.cloud.google.com/oauth-redirect, and provides the client ID and client secret. Getting this redirect URI right is what makes sign-in work later. - Create the data store — Go to Data stores → Custom MCP Server. Set the server URL to
https://ai.gotenzo.com/mcp, then paste the authorization URL, token URL and the client ID/secret from the previous step. Sign in and wait for the state to flip to Active. - Enable the tools — In the data store, choose Actions → Reload custom actions, pick the Tenzo tools you want, then Enable actions. Skip this and the connector is attached but does nothing.
- Attach it to your Gemini app — Go to Apps → your app → Add existing data stores and select Tenzo. Then open the app, go to Manage your data → Enable actions, and sign in to authorise. The Tenzo tools are now callable in that app.
The Gemini custom MCP connector is in Preview and is not supported with VPC-SC / PSC. On the Business edition, confirm custom MCP connector availability with your Google rep before committing.
Any MCP-compatible client can connect to the Tenzo server using:
| Setting | Value |
|---|---|
| Server URL | https://ai.gotenzo.com/mcp/ |
| Transport | Streamable HTTP |
| Authentication | OAuth 2.0 (handled automatically) |
If your client doesn't support remote MCP servers natively, use the mcp-remote bridge:
Authentication
The Tenzo MCP server uses OAuth 2.0. The first time you connect from a new client, you'll be redirected to Tenzo's login page to sign in. After that, your session is cached and you won't need to sign in again until the token expires.
The MCP server only has access to data your Tenzo account can already see — it respects your existing permissions and business access.
Example questions
Once connected, try asking your AI assistant things like:
| Category | Example |
|---|---|
| Sales | “Show me the revenue impact if my bottom 3 locations matched the upselling rate of my top performer.” |
| Labour | “On my highest COL % days, what did my GMs log? Is there a pattern in the reasons given?” |
| Inventory | “What's my waste cost per location this week, and which sites are outliers?” |
| Reviews | “What are the 5 most common negative themes in my reviews over the last 90 days, and which locations appear most frequently?” |
| Combined | “On my worst-reviewed days, what did labour, covers, and average spend per head look like vs my best-reviewed days?” |
Troubleshooting
Connecting
"Missing or invalid OAuth token" error
Your session has expired or the initial OAuth flow didn't complete. Try:
- Restart your AI client to trigger a fresh OAuth login.
- Check that you completed the Tenzo sign-in page when prompted.
- Ensure your Tenzo account is active and has access to at least one business.
Claude Web/Desktop: Tenzo isn't in my connectors list
Tenzo is added as a custom connector — it doesn't appear in Claude's built-in directory. If you don't see it, an admin needs to add it. See Adding a connector in Claude.
Claude Code: connection refused
- Confirm the server was added:
claude mcp list - Remove and re-add if needed:
claude mcp remove tenzothen re-add. - Check you can reach the server:
curl https://ai.gotenzo.com/should return a JSON status response.
Gemini CLI: not connecting
- Verify
~/.gemini/settings.jsonis valid JSON. - Restart the Gemini CLI after saving changes.
- Check you can reach the server:
curl https://ai.gotenzo.com/
Using
Tool calls are failing
If the connector is already authorised but tool calls are erroring or returning the wrong data, try these in order:
- Start a new chat — fixes most issues by clearing stale tool schemas and session state.
- Ask your AI to refresh the tools — e.g. "refresh Tenzo tools". Keeps the current conversation context if that matters.
- Re-run the analytics context check — if tools load but data looks wrong or requests fail with a business ID error. Ask the AI to run
get_analytics_context. - Disconnect and reconnect — for persistent auth or schema issues that survive a new chat. Remove Tenzo from your client's connector settings, then add it back.
"Public API error 403" or permission errors
Your Tenzo account doesn't have access to the requested data. Check with your Tenzo administrator that your account has the correct permissions and business access.
Data looks wrong or incomplete
The MCP server returns data from Tenzo's Public API, which reflects what you see in the Tenzo dashboard. If numbers don't match your expectations:
- Check the date range — the AI may interpret "last week" differently to what you expect.
- Verify the metric name — ask the AI to list available metrics first.
- Check for filters — the query may be scoped to a specific location.
Need help?
If you're still having trouble, contact Tenzo support at support@gotenzo.com with:
- Which AI client you're using (Claude, ChatGPT, Gemini, etc.)
- The error message or unexpected behaviour
- Your operating system
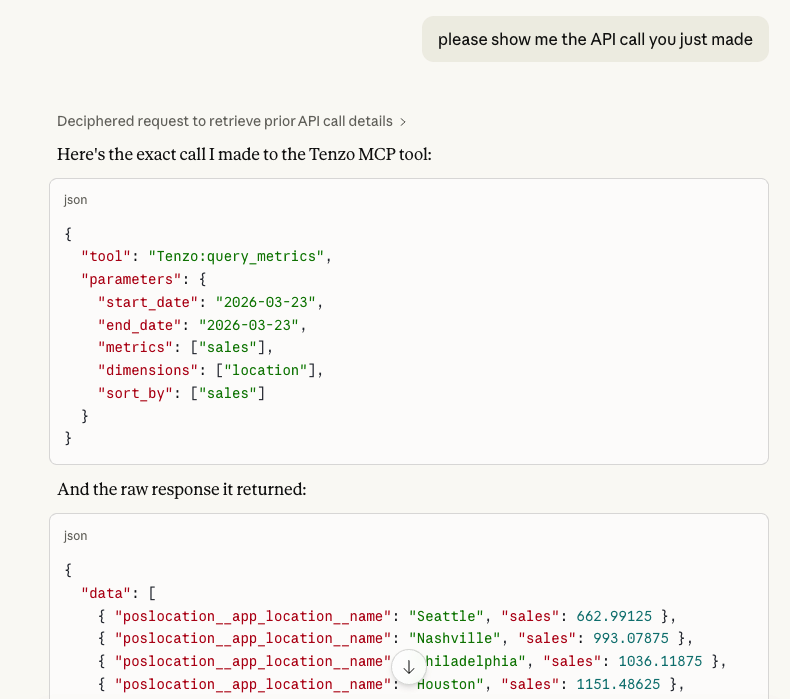
- The specific API request that was made (see below)
Including the API request.
When submitting a support request, it is very helpful if you include the specific API call that was made. Ask your AI client something like "please show me the API call you just made" — it will show the tool name, parameters, and raw response.